Author: wildpatch

  • Aster Yellows

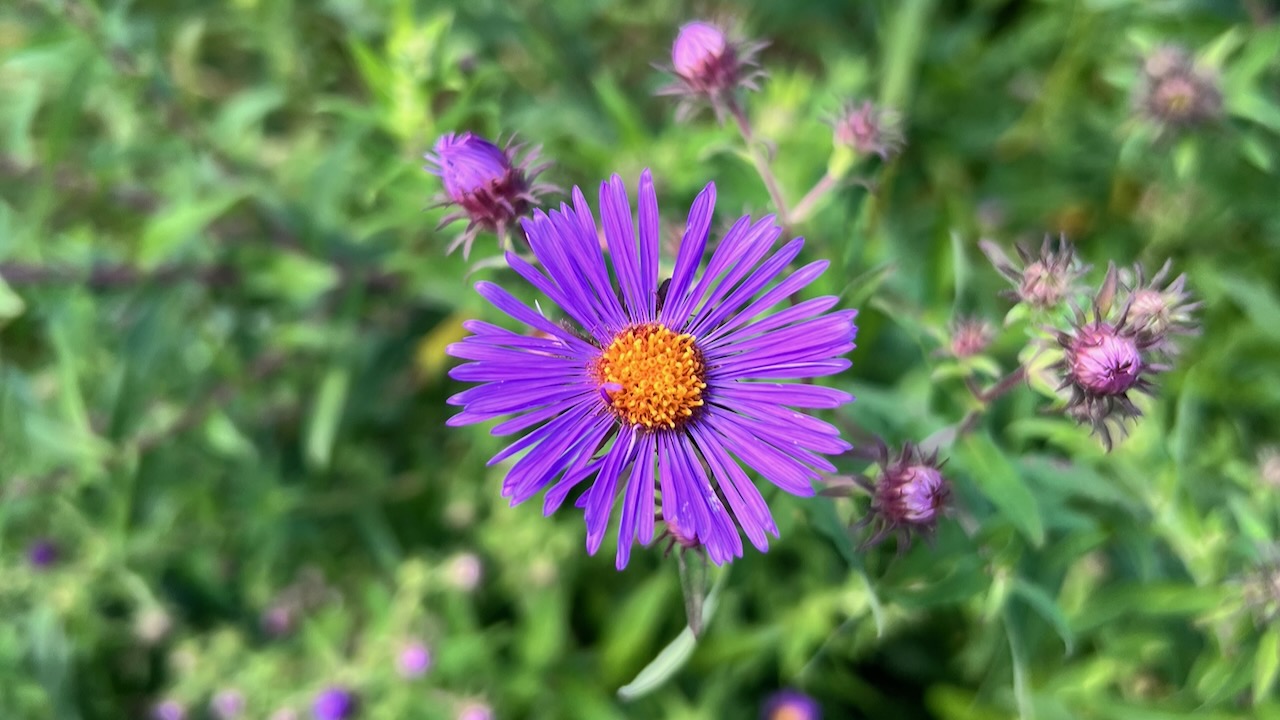
    We have a garden full of Asters. Last week, I started to wonder how long that would last because I noticed some of our Purple Coneflowers were blooming funny and had odd, spiky shapes coming out of them caused by an infection called Aster Yellows.

    Aster Yellows is relatively rare in Ontario but can get bad in years with strong southerly wind in the spring followed by a cool, rainy summer. Aster Yellows is caused by a bacterial infection and affects more than 300 species, most of which are in the Asteraceae family including Purple Coneflower, Coreopsis, Marigolds, and Sunflowers, as well as vegetable and grain crops.

    There is no cure for Aster Yellows and depending on the strain that has infected the plant and the climate conditions, the symptoms can range from deformed, poorly growing plants, to something you don’t notice at all.

    There are lots of detailed articles about Aster Yellows, so I’m not going to repeat that information here (but I’ll add a few links I found helpful below).

    How Aster Yellows is Transmitted

    The Aster Leafhopper (Macrosteles quadrilineatus), an insect Native to North America that travels on the wind, transmits the disease from one plant to another. Only 5% of Leafhoppers carry the infection but leafhoppers are fairly prolific.

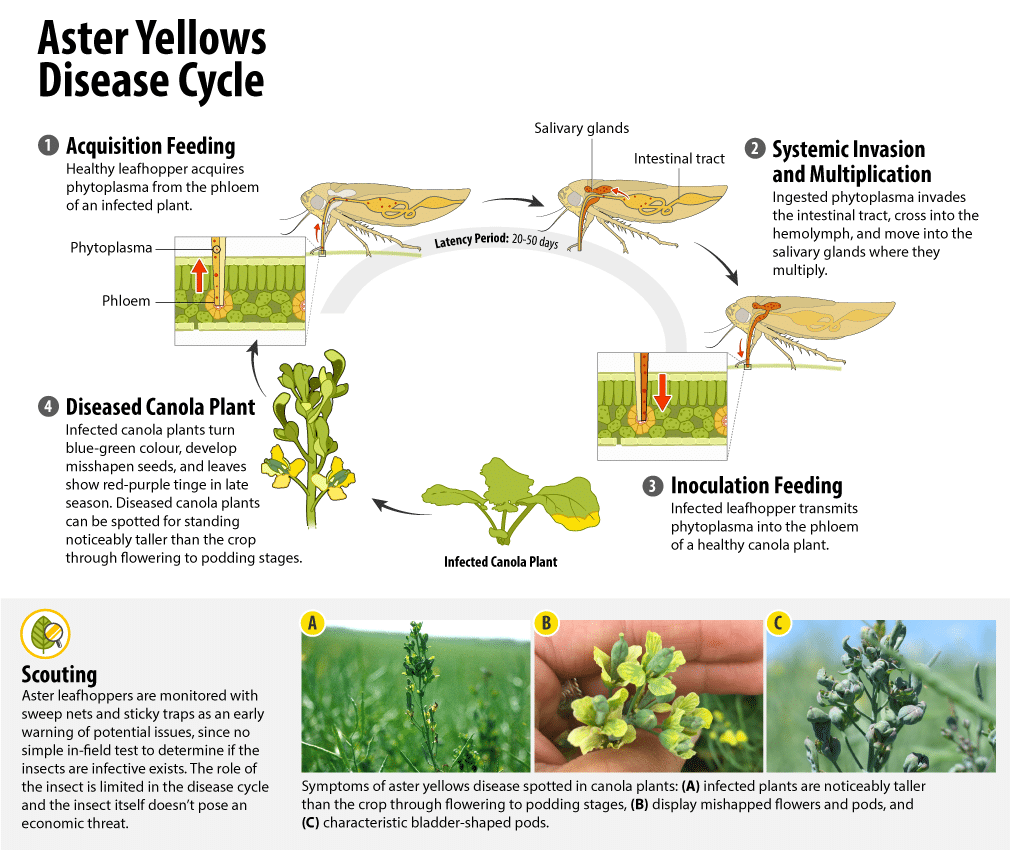
    The leafhopper feeds on an infected plant causing a bacterial infection in the leafhopper’s digestive tract. The infection does not affect the leafhopper. The leafhopper then does it’s leaf hopping thing and hops to a new plant. When it feeds on the next plant, the bacteria infects the new plant and begins to multiply.

    A diagram showing the aster yellows disease cycle: feeding, multiplication, inoculation feeding, and infection.

    Canola Council of Canada aster yellows disease cycle graphic

    Why do Some Plants with Aster Yellows Look Worse than Others?

    Aster Yellows takes 10 to 40 days to become visible in a plant and symptoms will be more acute in a plant that is actively growing because its leaves and flowers will become distorted.

    It is possible for a plant to get infected late in the season and then not display symptoms until the next year.

    Similarly, some plants will be asymptomatic either due to the plant’s growing conditions or it simply won’t show visible signs of infection.

    How We Manage Aster Yellows

    The key piece of information that helped me understand Aster Yellows was that some plants can be asymptomatic. Meaning you might have a Cone Flower that is in rough shape showing symptoms and a Golden Rod showing no symptoms. But they both could have it.

    We do our best to remove Aster Yellows to protect our veggie beds and our native plants, but we know that there is no way of keep it out of our yard.

    Destroy Visibly Infected Plants

    This is the sad part. I hate killing a plant but I also hate having a diseased plant that could impact our veggie beds. On the first year of infection, a plant with Aster Yellows might not show many symptoms, but on the second year, when the bacteria has time to spread in the plant, the symptoms will be severe.

    When we see signs of Aster Yellows, we bag up the plant and throw it in the garbage. It doesn’t go in our compost pile because the plant will stay alive there for a bit longer and leaf hoppers could still spread the disease.

    We still destroy plants that have minor signs of infection because they will come back worse next year.

    Let Other Plants Be

    There really is no guaranteed way of knowing if a plant has Aster Yellows if it isn’t showing obvious symptoms (distorted flowers, petals growing out of the wrong spot, etc.), but if it’s not showing symptoms, we let it be.

    Use Light Coloured Mulch

    Light coloured mulch has been shown to confuse leaf hoppers because they rely on the colour navigate. We are mulching with wood mulch and straw.

    Remove Dandelions, Plantain, and Other Weeds

    It never hurts to remove unwanted weeds from your gardens and pathways. Pulling dandelions and plantains helps reduce the chance of a leafhopper feeding on an infected plant.

    Resources

  • How I Draw Our Garden Plans

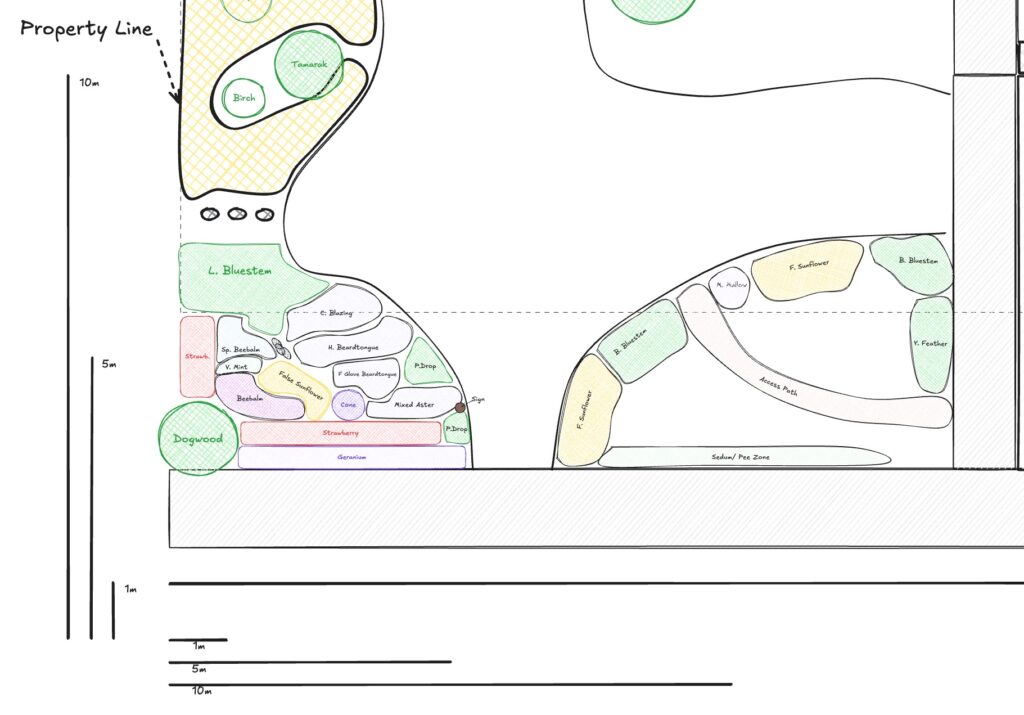
    I recently drew out a map of our 1/2 acre yard with all the garden beds and foundational plants in it. It took me a bit to figure out how to do this, but I was able to do it for free and pretty close to scale.

    Here’s a snapshot of a design I am working on for next year. I’ve saved the blank outline of the gardens as a separate file so I can print it out and draw by hand to brainstorm.

    I drew this in Excalidraw for Obsidian. If you’re not familiar with those two names, stick with me.

    Obsidian is a note taking app focused on privacy and interconnected ideas through a knowledge graph. It can get pretty technical! I’ve used it on an off and I’m sometimes intimidated by the features. Obsidian is available for MacOS and Windows.

    Obsidian has a plugin marketplace, which means you can install plugins that extend Obsidian’s functionality.

    Excalidraw is a free, open source drawing tool. That you can use in the browser. It has trimmed down features compared to something like InkScape, which is why it’s perfect for this job. It has just the right tool set and nothing more.

    The only trouble is that the free version of Excalidraw saves your drawing in the browser memory, which means you might loose the drawing unless you download it once in a while.

    Enter Excalidraw for Obsidian, a plugin that adds an Excalidraw canvas to Obsidian and saves your drawing locally. The plugin lets you use the [[]] syntax from Obsidian to link to an obsidian page in your drawing if you want to make more notes.

    Step 1: Install Obsidian

    Download Obsidian from their website and install it.

    Step 2: Turn on Community Plugins

    Community Plugins are disabled by default in Obsidian to protect users from installing un-vetted plugins. Follow this guide to enable community plugins.

    Step 3: Install Excalidraw for Obsidian

    You can find the Excalidraw plugin by clicking the “Brows” button in Obsidian or use this link to add the Excalidraw for Obsidian plugin.

    Step 4: Enable the Plugin

    Enable the plugin. This part got me. It’s confusing that you have to download and then enable as two separate steps. After you clicked “Install” the button changes to “Enable.” Click again to enable the plugin.

    Step 5: Find a Satellite Image

    Find a satellite image of your property. I found one from a local governing body that included our property lines, which was really helpful for getting the scale right. I took a screenshot of this image and pasted it into a new Excalidraw drawing.

    Step 6: Create a New Drawing

    I am on Mac so I press command+p to open the command pallet and type “New Drawing” to find the command to create a new Excalidraw drawing. I pasted the screenshot into this drawing.

    Step 7: Resize to Scale

    Resize the image until 1 m is roughly one large square on the grid. If you don’t see the grid, right click on the canvas and enable the grid.

    I referenced a few real-world anchor points to get the scale roughly correct. One of the large squares is 1 metre squared on our property. This prints out at a good size on 8.8 x 11 paper.

    Step 8: Draw Property Lines and Anchors

    Use the square tool to approximate your property line. Then use the other tools to place a few anchor points in your garden like fences, trees, and sidewalks.

    Step 9: Move the Image out of the Way

    Move the satellite image out of the way or dim its opacity waaaay down. I wish Excalidraw had real layers so you could lock and hide the screenshot, but dimming it or moving it entirely out of the way is good enough.

    Step 10: Start Drawing

    This is where I started using the line tool to outline our garden beds and other features. I referenced the satellite image once in a while, but the tree canopy covered part of our garden and it was a bit out of date.

    Printing Your Drawing

    If you want to print your drawing, install the Excalidraw Extras Plugin, which lets you create frames for printing. Be sure to hold the shift key when scaling the frames to keep the ratio the correct size for your printer. Zolt, the developer who created the plugin, has a tutorial on frames and printing on YouTube that I found helpful.

    Conclusion

    That’s how I got a base map set up for our garden. I printed it off and brainstormed garden plans in pencil then duplicated the file for my garden plans and started drawing out final plans for next year’s garden beds.

  • Native Plants in Bloom in the Ottawa Valley in Mid July

    Our garden comes into full bloom in July and August, so I thought I’d document what’s blooming, whats about to bloom, and what has seed pods.

    Full Bloom

    Black Eyed Susan (Rudbekia Hirta)

    This hardy garden standard is coming in full bloom with a few buds still opening. I’ve noticed this year that as other plants become more established, some of our Black Eyed Susans are too short for the beds they’re in. Next year, we’ll have to move them to the front of the bed or a shorter area.

    Tall Meadow Rue (Thalictrum dasycarpum)

    It’s tall! At about six feet tall our Tall Meadow Rue has been blooming for a couple of weeks now. I wish we had a small cluster of these!

    White Yarrow (Achillea millefolium)

    Unstoppable, our White Yarrow has been in full bloom for a few weeks.

    Hair Bell (Campanula rotundifolia)

    We had a small cluster of Hair Bells but a combination of last year’s drought and crowding has left us with one. But it’s going strong!

    Bee Balm (Monarda didyma)

    Our Bee Balm is a brilliant splash of colour on the berm is is a real show-stopper right now.

    False Sunflower (Heliopsis helianthoides)

    False Sunflower contrasts wonderfly with Bee Balm and forms a dense, flowing cluster.

    Foxglove Beardtonge (Penstemon digitalis)

    We planted our Foxglove Beardtonge in an area we call the “nursery bed” while we wait for some beds we have tarped to be available. Foxglove Beardtongue is a long bloomer and has dense flower clusters. Our nursery bed gets about 4 hours of sun a day but this isn’t enough for this plant! It’s flopped over onto the neighbouring Dogwood.

    Meadowsweet (Spirea alba)

    I’ve noticed that Meadowsweet can be a long bloomer in the right conditions and will cut it’s blooms short in dry weather. We’ve had a mix this year but really good rain in June. Our Meadowsweet started blooming about a week ago and is still going strong.

    Butterflyweed (Asclepias tuberosa)

    Butterflyweed takes a couple years to establish and once it is, it’s a long-blooming, eye-catching plant. We have five of them in full bloom on garden edges right now.

    Just Starting

    Pearly Everlasting (Anaphalis margaritacea)

    A sturdy, dry-loving plant with thick, moisture-retaining roots, Pearly Everlasting is starting to bloom right now and its flowers will last well into September.

    Spotted Joe Pye (Eutrochium maculatum)

    We have a handful of Spotted Joe Pyes in well-drained areas. They range from four to seven feet tall right now and their lavender flowers are just coming out.

    Purple Conflower (Echinacea purpurea)

    Another garden workhorse, Purple Coneflower is just coming out right now. To our knowledge, all our Purple Coneflower is native but there is a clear distinction between the straight native plants and the ones cultivated by a traditional nursery. The traditional nursery plants are stout and dense where the natives are sparse and tall. Two of our native Purple Coneflowers are almost five feet tall!

    Yellow Coneflower (Ratibida pinnata)

    This sun-loving coneflower is in the early days of blooming. The plants crane towards the sun and will flop over easily if they’re not supported. It grows really well in a dense meadow setting.

    Cool Buds Forming

    Rose Mallow (Hibiscus moscheutos)

    Rose Mallow, a species of special concern in Ontario, is forming is alien-looking buds right now. We have a small cluster of them in a rain garden and it is thriving. Rose Mallow is native to small pockets of south-western Ontario.

    Big Bluestem (Andropogon gerardi)

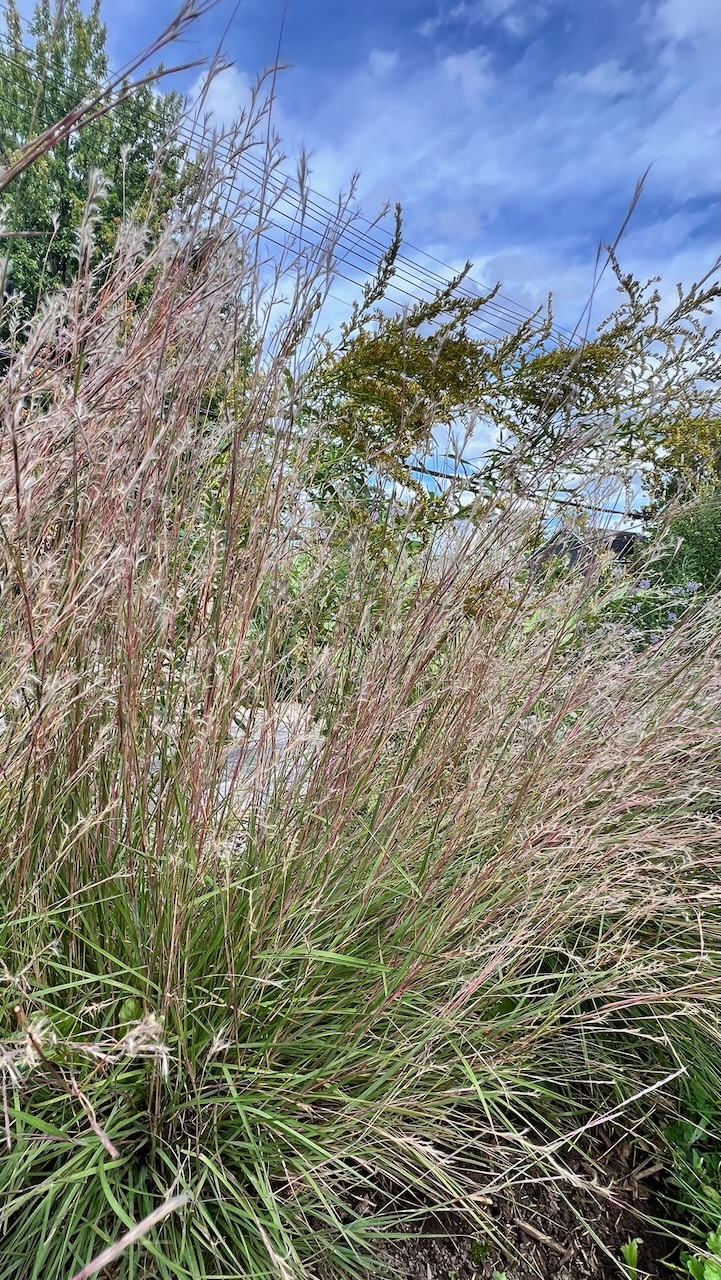
    Big Bluestem can take a few years to establish, and once it does it will form tall, dense stands of grass that look beautiful through the summer and fall. I noticed this morning that some of our stands are just starting to form their buds.

    Wild Bergamot (Mondarda fistulosa)

    Our Wild Bergamot has strong buds right now. I’ve noticed this year that the small clusters that have self-seeded are looking healthier than the older, denser plants. To prevent powdery mildew, I thinned the denser clusters this year.

    Dense Blazing Star (Liatris spicata)

    Dense Blazing Star is threatened species in Ontario. Like Rose Mallow, it is native to pockets of South West Ontario. In our garden, the plants that get the most sun are just starting to bloom while the ones in shadier locations are in the early stage of forming buds.

    Seed Pods Forming

    Bottlebrush Rye (Elymus hystrix)

    An early bloomer, all of our Bottlebrush Rye are forming their seedpods right now. Bottlebrush Rye’s stiff-looking flower creates beautiful texture in the garden.

    Canada Anenome (Anenome canadensis)

    Long-blooming, Canada Anenome has started forming its seeds, which provide visual intrigue and texture.

    Hairy Beardtongue (Penstemon hirsutus)

    This easy-to-grow plant is now forming its seed pods after a long spring blooming period. The pale purple/lavendar flowers were a joy in the garden this season.

    Lanceleaf Coreopsis (Coreopsis lanceolata)

    Lanceleaf Coreopsis is still in bloom in your yard but is on the tail end. Most plants have juicy-looking seedpods forming.

    Bush Honeysuckle (Diervilla lonicera)

    This is the first year our Bush Honeysuckles bloomed. It had a short bloom period with tiny yellow flowers. Our Bush Honeysuckles are still getting established. They’re not in ideal conditions for the plant due to the high silt content in our soil but we’re pleased with the low-growing density they provide.

  • Should I Add Mushroom Compost to my Veggie Bed?

    Like any good question: it depends! Mushroom compost can clump, has lots of organic matter, has a high pH, and is high in some minerals. Each plant will respond differently to mushroom compost.

    Here’s a helpful breakdown that I found on a poster at a local community garden. Thanks community garden organizers!

    This table comments on the nutrient, acidity, and pH contents of compost. Given that every compost source is different, its a good idea to test your soil and compost so you know what you’re changing by adding compost.

    VeggieMushroom Compost?Notes
    Tomatos✅ YesBenefits from the nutrients and moisture retention.
    Peppers✅ YesThrives with improved drainage and nutrients from compost.
    Cucumbers✅ YesBenefits from the nutrients and moisture retention.
    Squash (Zucchini, Pumpkin)✅ YesBenefits from the nutrients and moisture retention.
    Corn✅ YesHeavy feeder – mushroom compost provides a good nutrient boost.
    Lettuce, Leafy Greens⚠️ CautionSmall amounts help, but too much can make soil too rich or alkaline.
    Spinach🚫 NoPrefers neutral to slightly acidic soil; mushroom compost is often too alkaline.
    Carrots🚫 NoCompost can cause forked roots; best in looser, sandier soil.
    Beets⚠️ CautionCan tolerate a little, but does not like high acidity. Excess nitrogen, promotes leaves, not roots.
    Radishes⚠️ CautionUse in moderation to avoid excess nitrogen, which promotes leaves, not roots.
    Potatoes🚫 NoHigh lime content in mushroom compost increases risk of scab.
    Onions & Garlic⚠️ CautionTolerate small amounts but prefer leaner, well-drained soil.
    Beans & Peas⚠️ CautionCan grow in it, but prefer less rich, neutral soil.
    Brassicas (Kale, Broccoli, Cabbage)✅ YesThrives in the high nitrogen environment from the compost.

    Nutrients Profile of Mushroom Compost

    Mushroom compost contents can vary depending on where you get it and what types of agriculture are near by. Typically, compost is made using three types of ingredients: a source of carbon like straw, corn cobs, or poultry litter, and a source of nitrogen like manure.

    The compost is mounded up and soaked with water so it begins decomposing. Then it’s heated up to inoculate it and prepare it for mushrooms. Once the grower has used the compost for mushrooms, the spent compost is sold at your local garden centre or given away if you’re lucky.

    According to the American Mushroom Institute mushroom compost on average is comprised of:

    • 2.29% calcium
    • 1.24% potash (potassium),
    • 1.12% nitrogen
    • 1.07% iron
    • 0.67% phosphate (phosphorous)
    • 0.35% magnesium

    Most plants prefer a slightly acidic soil with a pH between 6.0 and 7.0. A pH of 7 is neutral. On average, mushroom compost has a pH of 6.6.

    The carbon to nitrogen ratio of soil is important because it indicates the balance between energy sources for beneficial microbes (carbon) and nutrients used to build proteins (nitrogen).

    High carbon content will result in higher microbial activity that competes for nitrogen with the plants because the microbes need the nitrogen to consume the carbon-based plant material in the soil.

    Soil for growing food should have a carbon to nitrogen ratio of around 24:1. Mushroom compost has 13:1 ratio which means it is high in nitrogen and has a reasonably good content.


    Sources

  • Spotted Joe Pye

    Spotted Joe Pye

    Binomial: Eutrochium maculatum

    Joe Pye is a versatile, easy-to-grow plant that thrives in moist, well-drained soil. It’s capable of handling many conditions but struggles in very dry conditions.

    This plant provides beautiful texture and structure to our garden, and provides showy, light pink flowers that attract pollinators of all kinds.

    We have a couple of patches of Joe Pye in our yard. They grow between three and five feet in height, but one patch gets up to 12 feet!

    We use this plant to create height towards the back of our garden beds and to create a quick-growing privacy screen in front of our kitchen window.

    We have both the straight native and a nursery cultivar in our yard. The nursery cultivar is much denser and taller than the straight natives, but it does not spread by seed on its own.

    The straight natives spread by seed in moist conditions, but are not aggressive. Since we have two variations, I wouldn’t consider our seedlings to be straight natives. There is a very good chance they are cross-pollinated with the nursery cultivar.

    Why We Chose Spotted Joe Pye

    Spotted Joe Pye is a true native of Eastern Ontario. You can find it in damp meadows and along waterways. We’ve seen Joe Pye and its close relative, Boneset, on many canoe trips in Ontario and Quebec.

    We love the height and texture this plant adds to our garden. Its staggered leaves and cloud-like flower clusters give the garden beds a natural texture. Plus, pollinators love this plant. As soon as it blooms, its buds are busy with flying insects and butterflies.

    A plant with narrow pointed leaves up the stem and fluffy, pink flower clusters at the top.
  • Meadowsweet

    Binomial: Spirea alba

    We found our first Meadowsweet at a local nursery. We were surprised to find a straight native at a conventional nursery, but meadowsweet is such a showy plant on its own that the nursery must have realized it sells itself!

    Meadowsweet is a versatile plant in moist to wet soils. We have ours planted downhill from our drain pipes. The soil in this area is relatively dense clay with a layer of sandy loam on top. The area gets all-day sun until about 3 pm and can dry out during low-rain periods.

    Many guides say Meadowsweet needs wet soil, but that hasn’t been the case for ours. We might be pushing the extreme of its dry tolerance. There was a drought last summer, and it survived with no extra watering, but it grew significantly less than in the years before.

    We have a second Meadowsweet in a rain garden next to a high-volume downspout. This particular plant hasn’t had a good time. It has occupied three different locations in our yard, each with its own challenges. First getting crowded out when it was young (our fault!), then drying out on a berm we thought had more moisture than it did. The downspout location is new this year and should be a great resting spot for this plant.

    Popular with Polinators!

    Meadowsweet is a busy plant when it’s in full bloom! Bees, wasps, and flies love the delicate aromatic flowers, and so do we! It’s a very showy plant.

    Why We Chose Meadowsweet

    Its delicate white flowers are a wonderful replacement for Bridal Wreath Spirea, a non-native sibling. When we moved in, we had two Bridal Wreath Spiraeas, and their drooping branches looked too opulent for our style. Meadowsweet’s mound shape and conical flowers provide a strong anchor point in our garden and attract far more pollinators than the Bridal Wreath they replaced.

    We also chose Meadowsweet for water management. We have drainage that comes down one side of the house. During the melt, we get a small spring trickling out of the grass onto the sidewalk. We’ve planted moisture-loving plants along this strip to absorb and retain more of this water before it hits the street.

    Meadowsweet is a larval host for the Spring Azure butterfly, a stunning little blue butterfly that you see in the early spring.

  • Welcome to Wild Patch

    Welcome to Wild Patch

    In 2023, we moved to the Ottawa Valley and started a native plant garden on our 1/2 acre in town. We have learned a lot, and this blog will document some of the things we’ve learned.

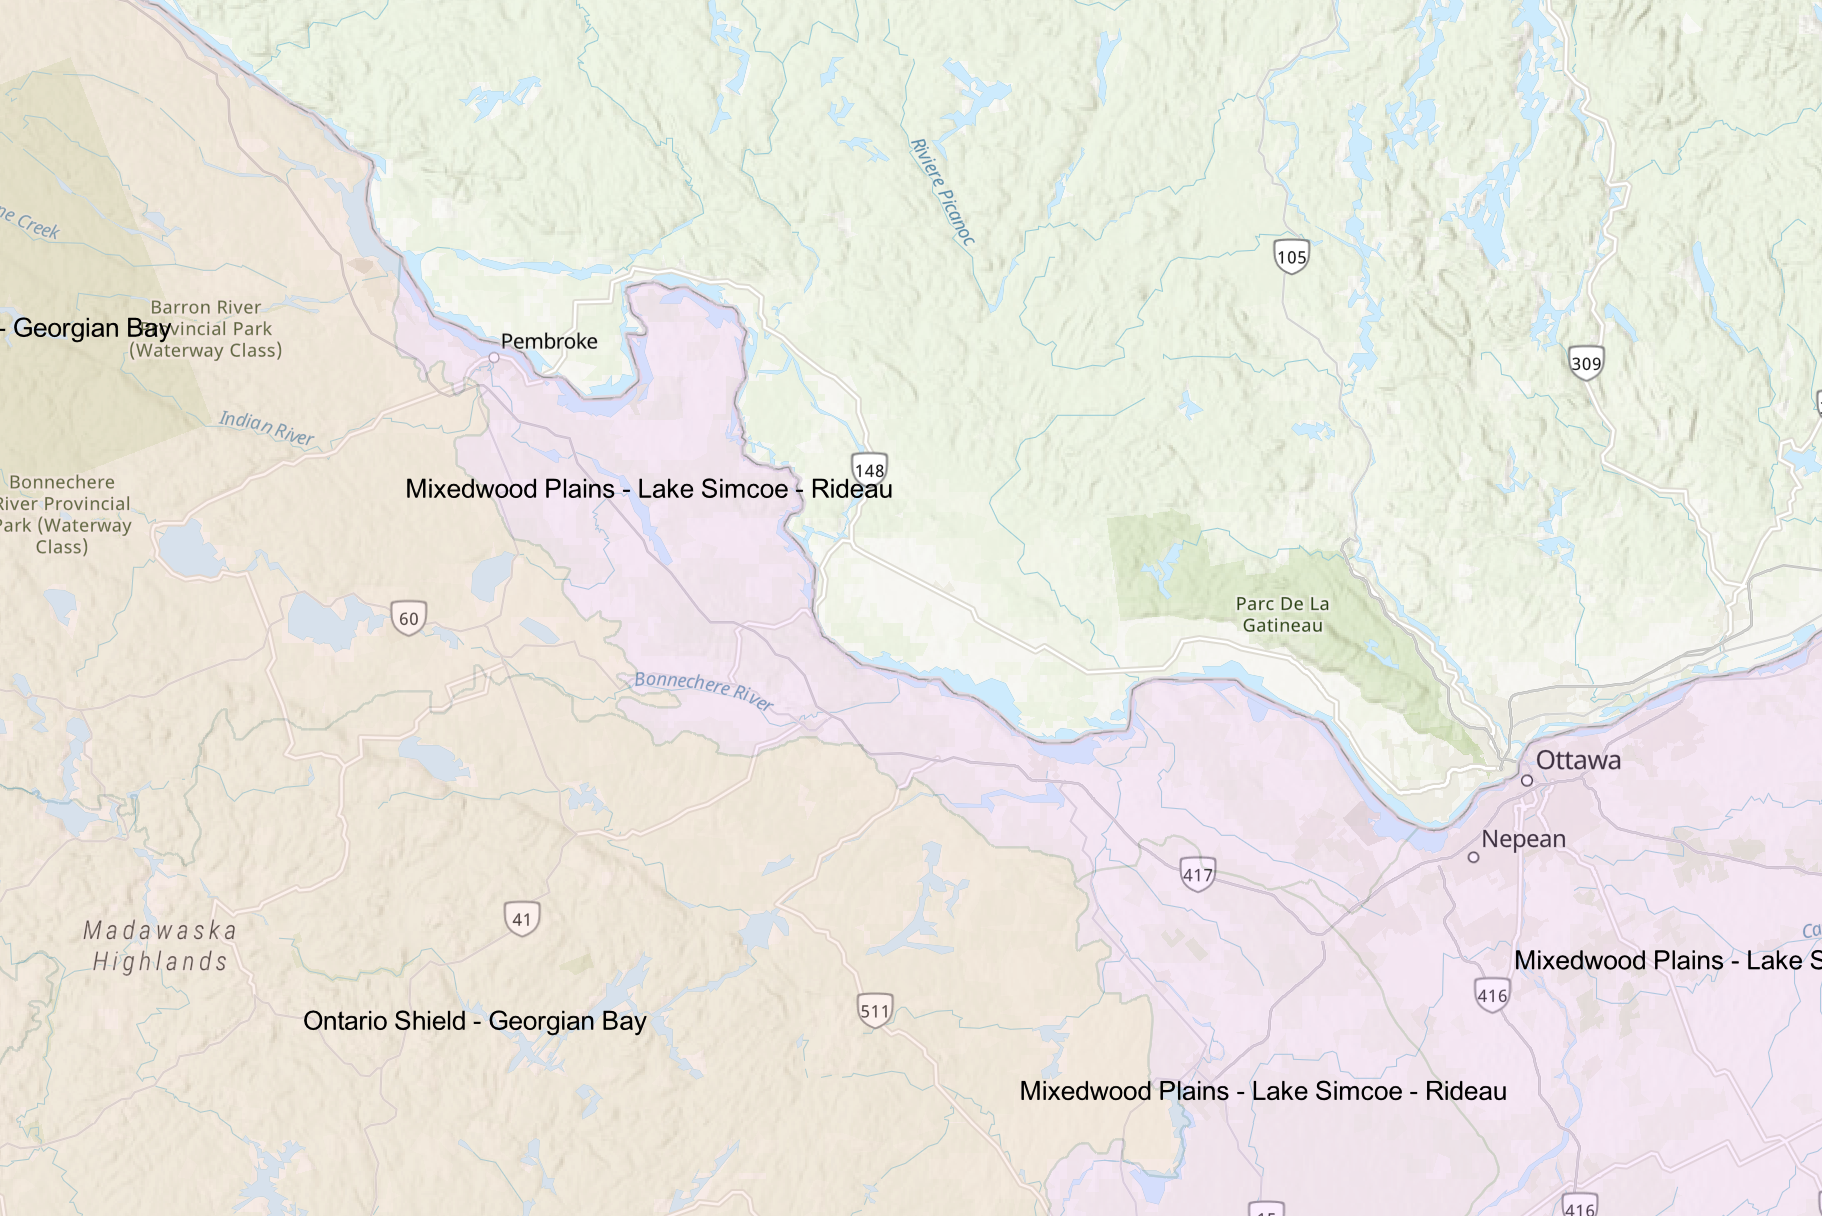
    We are also working on a native plant database unique to the Ottawa Valley and Lanark County. Over the years, we’ve collected information from a whole bunch of resources to piece together what works in our yard and how to grow plants that are truly native to this region.

    We have many plants thriving in our yard that bugs and birds love, and we’ve learned that some of them don’t have a native range this far north. Many resources list native plants by province or growing zone. Ontario is HUGE! A plant native to south-west Ontario might never be seen in the Ottawa Valley.

    We want to grow plants that support the local ecosystem of bees, bugs, birds, and other wildlife. So we’re doing our best to learn how to grow a garden that supports the changing ecosystem we live in.